Welcome to our guide on how to glue metal to wood. Where you’ll learn all about the unlikely union of wood and metal. Wood and metal are the odd couple of the material world. Think of them as the DIY equivalent of pineapple on pizza – unlikely, yet surprisingly functional! It might not sound like it, but bonding wood and metal together is actually a fairly simple process. No, you don’t need a burning hot furnace and a giant hammer to beat the materials into submission. Sounds like a lot of fun, but really all you need is a cooperative adhesive to do the trick.
Tools Needed To Glue Metal To Wood
As we said, bonding metal and wood isn’t a difficult task. But that depends on having the best glue for wood and metal available and the right tools in your arsenal. Cutting paper is pretty straightforward, but without scissors it becomes a bit challenging, right? So, here are some tools you’ll need to make your bonding process a lot easier:
Adhesive
There’s no shortage of adhesive options on the market. However, there are three types of metal-to-wood glue commonly used in bonding, each with its own unique features and suitability for different applications. Here are the most commonly used adhesives for gluing wood and metal:
Epoxy Adhesives: If glues were the Avengers, epoxy adhesives would be the Incredible Hulk. They are all about strength. If you’re looking for sheer bonding durability, epoxy adhesives are the strongest glue for metal to wood and also come with a healthy level of temperature resistance, making them suitable for indoor and outdoor application.
Polyurethane Adhesives: Polyurethane adhesives are a lot like Spiderman, possessing great flexibility and versatility. Similar to how spider man can bend and twist easily, Polyurethane adhesives can accommodate movement between the bonded materials, even after the glue has dried. This makes them perfect for application where flexibility is needed.
Cyanoacrylate (superglue): We’ve all heard about superglue, probably the most common adhesive in the world. Superglue shares the speed and quickness of the flash. Ust like the flash’s lightning-fast movements, superglue is popular for its quick bonding time, which can take just seconds. This makes it ideal for jobs that require immediate adhesion.

Sandpaper
Sandpaper is used to prepare the wooden surface before bonding. This helps create a better surface for the adhesive to bind to.
Clean cloth/rag
You’ll need to wipe off debris and spilled glue while you work. So it’s important to keep a clean cloth or two nearby.
Mixing Tools
If you’re using a two-part adhesive like epoxy, you’ll need tools for mixing the adhesive components thoroughly. This can include mixing sticks, disposable cups, or syringes, depending on the specific adhesive.
Protective Equipment
Safety should always be a priority. Wear protective equipment such as safety goggles or glasses and gloves to safeguard against potential eye or skin contact with the adhesive.
Application Tools
Depending on the adhesive and its recommended application method, you may need tools such as brushes, syringes, or spatulas to apply the adhesive evenly and precisely.
Drying and Curing Aids
If necessary, consider using additional aids like clamping blocks, supports, or weights to maintain proper alignment and pressure during the adhesive’s drying and curing process.
Step-by-Step Process of Glueing Metal To Wood
Now you’ve gathered all your necessary tools; it’s time to make a bond even Romeo and Juliet would envy.
Step 1: Prepare the surfaces
The first step of the process is making sure both the metal and wood surfaces are ready to be bonded. Use those clean clothes we mentioned earlier to wipe off the metal thoroughly. Lightly sand the wood; this creates a rough surface for the adhesive to grip onto. Be careful while sanding and dusting as debris could harm your eyes – you probably need them to complete this process.
Step 2: Select and apply the adhesive
Choose an adhesive that suits your needs and the project you’re working on. Once you’ve made your decision, it’s time to apply it to the metal and wood surfaces. Application instructions usually come with the adhesive. Make sure you apply it evenly and remember, it’s not frosting on a cake; the more isn’t always the merrier.
Step 3: Join the metal and wood together
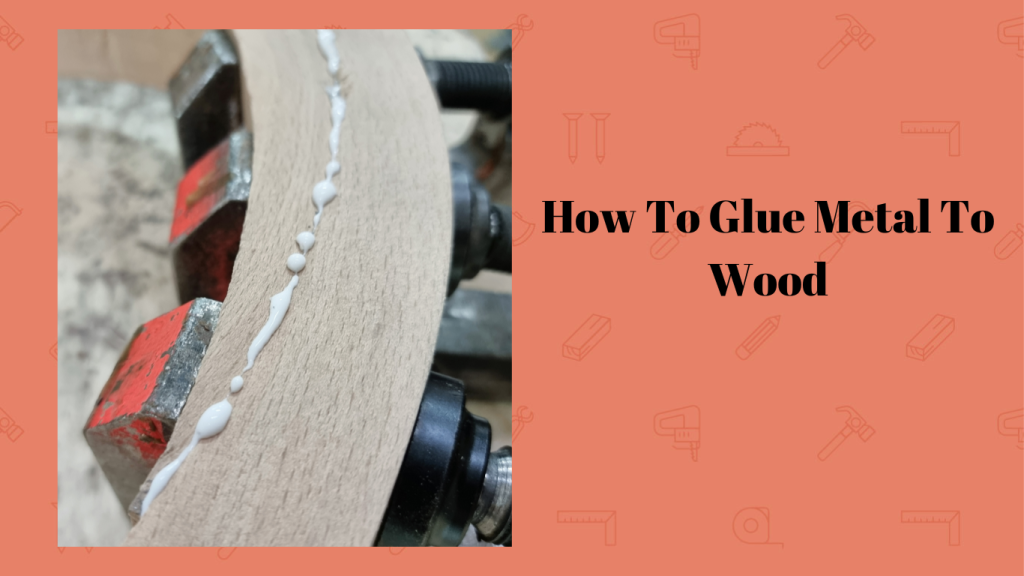
You may kiss the bride! The unlikely couple can now be joined together, and as long as you use the right adhesive, their union should be long-lasting. If you don’t, you’ll be dealing with a divorce pretty quickly. We highly recommend using the proper glue and a clamp or wedge to hold them firmly while drying.
Step 4: Patience!
Allow the glue to dry according to the time recommended by the manufacturer. If you use superglue, don’t worry, you won’t have to wait long. But for others that don’t dry within seconds, you’ll need to resist the urge to peek or test the bond. It’s super tempting, we know. But hang in there.
Step 5: The Unveiling
Release the clamps and behold your masterpiece. Marvel at the strength and beauty of the bonded metal and wood. Congratulations!

Common Slip-Ups During Metal and Wood Bonding
As we said, metal and wood are an unlikely couple. Hence, you may be forgiven for a blooper or two during the process. However, as always, we are here to ensure that doesn’t happen.
Failing to sand the wood
Ahhh, where else do we begin, if not the most common and most costly error – applying adhesives without sanding. Skipping this step is like attempting to dance on wet floor. Even the strongest wood glues won’t work if the surface isn’t prepared. Sanding your wood gives the glue a rough and ready surface to grip onto.
Ignoring protective gear
Okay, maybe failing to sand the wood isn’t THE most costly error you could make. Considering failure to wear protective gear could lead to physical harm. We are here to bond metal and wood, but your fingers will be doing some bonding of their own if you don’t wear some gloves. You should throw in some goggles too, for good measure.
Don’t waste glue!
Using too much glue on your bonding is like overpacking for a 3-day trip – tedious and unnecessary. An even spread and a little extra down the sides is all you need; keep the rest of the adhesive for when something inevitably breaks around the house. Thank us later!
Picking the wrong adhesive
We would like to believe we don’t need to go into too much detail on this. If you’ve read this far, you get the gist. Wrong adhesive = bad bonding = starting all over again. We don’t want that, do we?
How to maintain newly bonded pieces
Now you’ve succeeded in bonding metal and wood, it’s time to learn how to keep them bonded long-term. Don’t worry, it’s not a houseplant that needs your daily attention to survive. Keeping your bonding safe is a lot more about the DON’Ts than the DOs. In fact, “leave it alone” is a pretty good place to start.
However, just so we’re clear, you shouldn’t:
· Touch or move it constantly
· Expose it to temperatures the adhesive cant handle
· Allow dust or grime to accumulate on it
· Put excess stress or heavy impact on it
Conclusion
That’s it for our guide on how to glue metal to wood. Remember to follow the step-by-step guide and pay close attention to the maintenance tips. Granted you do everything right, your bond should last a long time. Congratulations on creating a masterpiece!
*This post may contain affiliate links. Please see my disclosure to learn more.


